
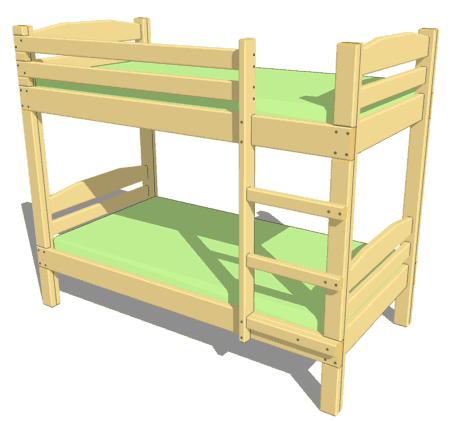
Children have always liked bunk beds more than the traditional single beds. There is just something special about being on the top bunk bed for some kids while others enjoy the enclosed feeling of the bottom bed.
Not only is it cheaper than buying two separate single beds, but it also saves a lot of space. It works exactly like the skyscraper principal; if you don’t have enough space on the ground, you build up.
Building bunk beds is a great project for the DIY enthusiast to tackle and will save you lots of money. It is absolutely priceless to see the joy on your children’s faces when you assemble the bunk beds you’ve made for them. Instant Super-Hero status!!
Below are the plans to build bunk beds.
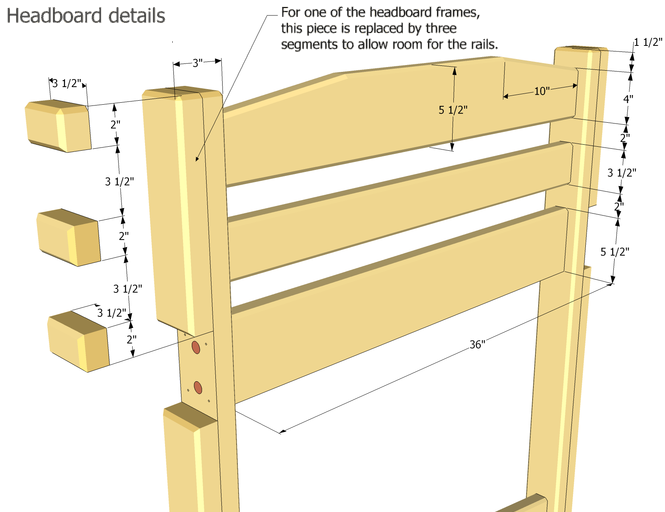
First, you have to make the headboard and the footboard. These two frames are identical except for one difference. The headboard accommodates the guard rails and uses three blocks on the side instead of a single piece as shown below.
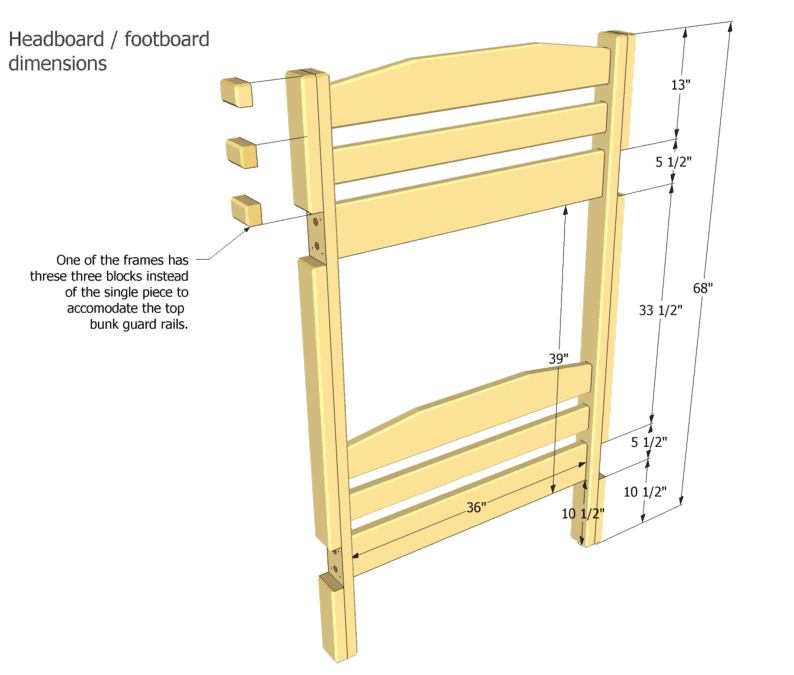
Below are more detailed measurements that you need to construct the headboard.
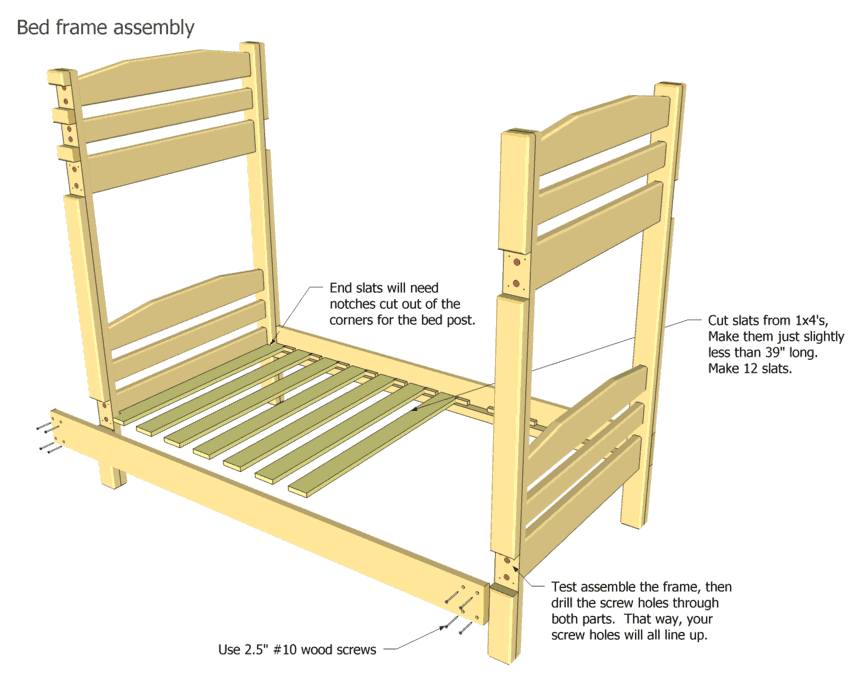
When you have constructed the headboard and the footboard, you have to make the side rails. You have to make two side rails that are identical.
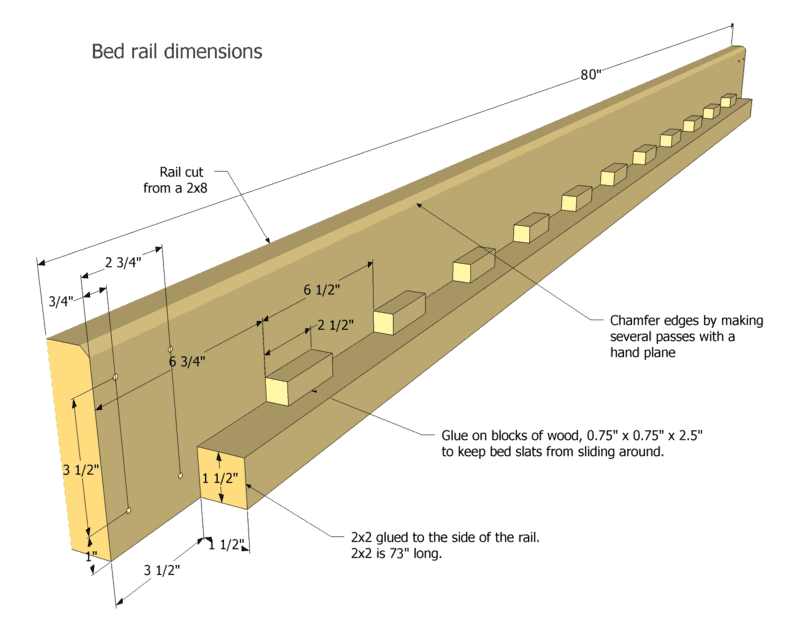
When the side rails are completed, you can start with the assembly process.
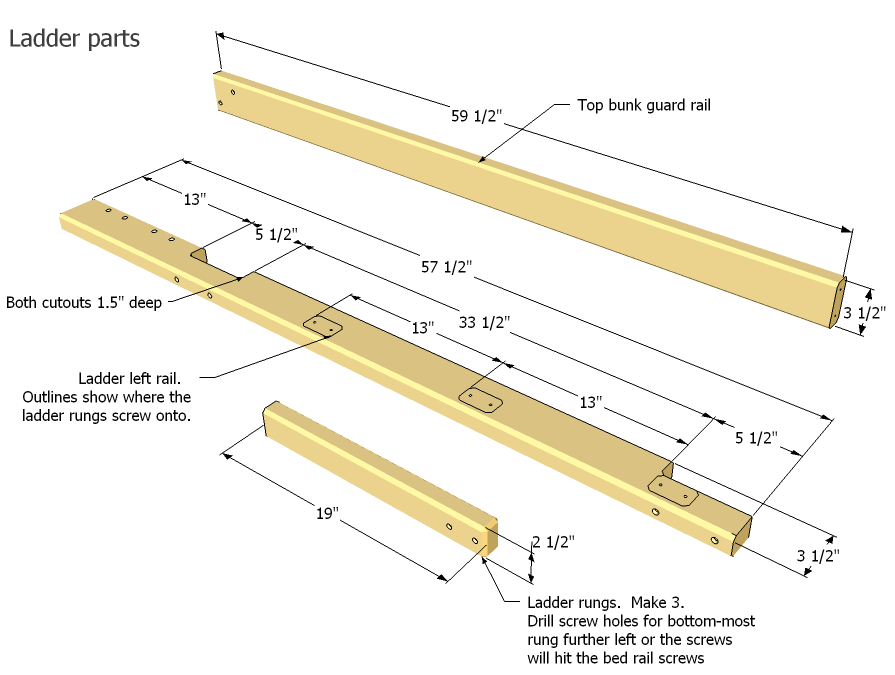
The next step is to make the parts for the ladder assembly.
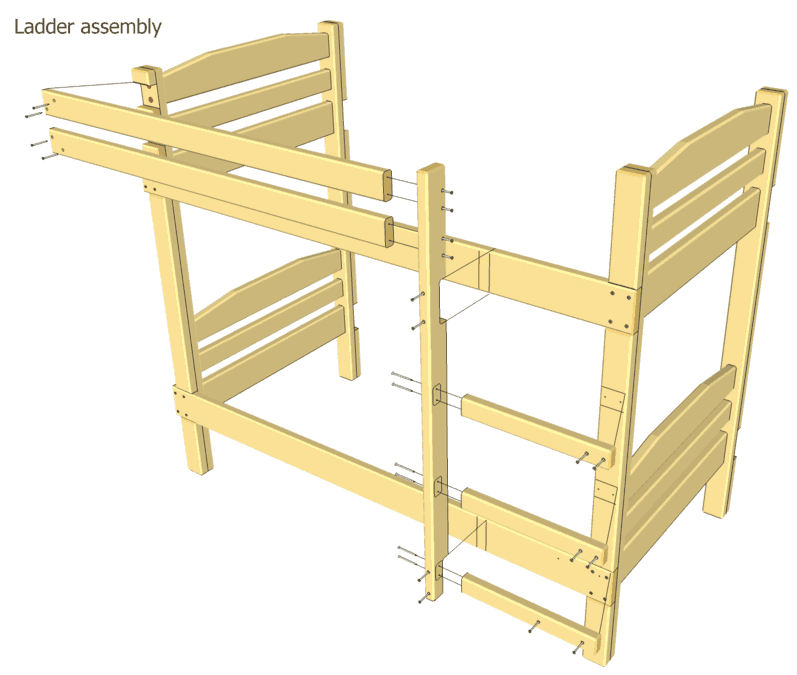
You can now go ahead and assemble all the parts and finish the project.
This is just one set of plans that we found on the internet, there are thousands of variants you can use to build bunk beds that suit your needs. Here are a few tips when choosing plans:
- Make sure that the beds will be the right size. Look at the length of the beds in the plan and make sure that this is sufficient for the size of your children. You don’t want to go through all the effort only to realize that the beds are too small.
- Choose a sturdy design. There are many designs that I would not use for a bigger child. This is where common sense comes in, look at the design and how solid the structure appears to be. This is not the end of the world as a flimsy structure can always be strengthened afterward.
- Make sure that you have all the tools to make the cuts and joints required.
- Do a material cost summary before you start the project. You do not want to get halfway through the project only to realize that it is going to cost way more than you thought. It is easily done, believe me!
Get access to over 16,000 woodworking plans Find Out Here
Tools needed to complete the task
- Cutting tools like a hand saw, jigsaw and table saw. We have more information on the best jigsaw on this page.
- Drilling tools like a cordless drill and drill press. All our drill press reviews are here.
- Measuring equipment like tape measures and marked straight edge. These tools are very important to get the specifications spot on.
- Marking pen to mark all the measurements on the wood.
- Wood router to finish off all the edges and give your bunk beds that professional look.