

Last Updated on September 21, 2023 by Marc Smith
In this article we take a look at how to use a digital level. As a construction professional with over 30 years of experience, I’ve seen my fair share of tools come and go. But one recent addition that has made my job much easier is the digital spirit level.
If you’re still squinting at those tiny etched lines on a traditional level, it’s time you gave these high-tech versions a try. Trust me, I was sceptical at first too, but now I won’t build a thing without my trusty digital level by my side.
Contents
What Exactly is a Digital Level and Why Use One?
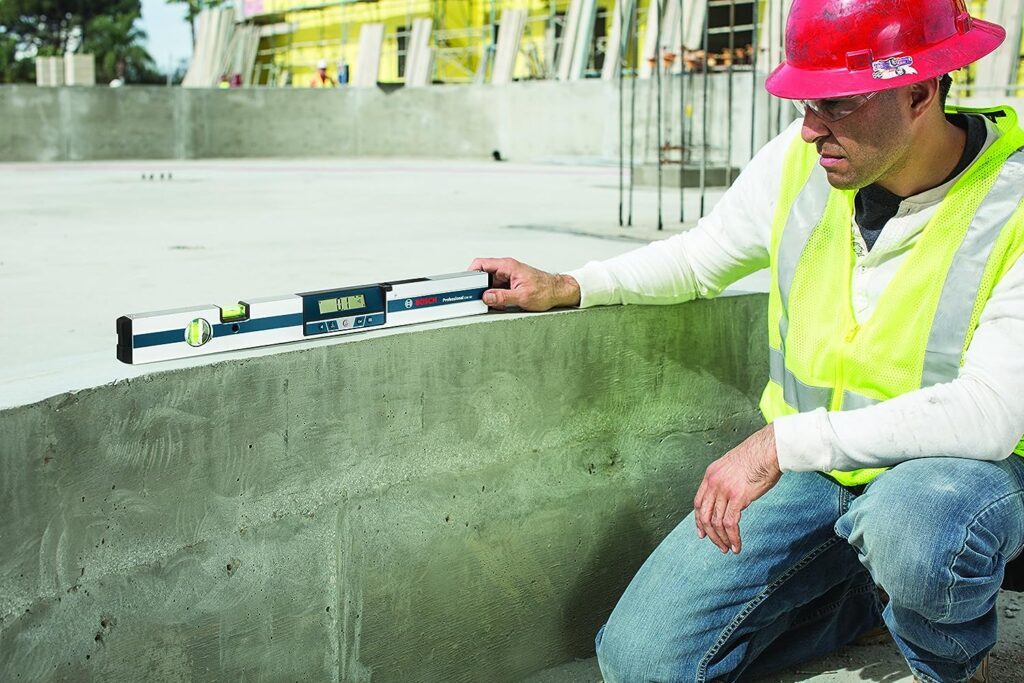
A digital level, also sometimes called a digital protractor, is a tool used to determine if a surface is precisely horizontal or vertical. It’s similar to a traditional spirit level in function, but replaces the glass vial and etched lines with an LCD or LED screen that provides a precise digital readout of the angle of tilt.
So why would you want to upgrade from your old bubble levels? Here are some of the key advantages:
- Greater Precision – Digital levels use extremely sensitive internal sensors to detect even the slightest deviation from 0 or 90 degrees. We’re talking precision to 0.1 degrees in many cases. No more guesswork trying to eyeball the bubble between lines.
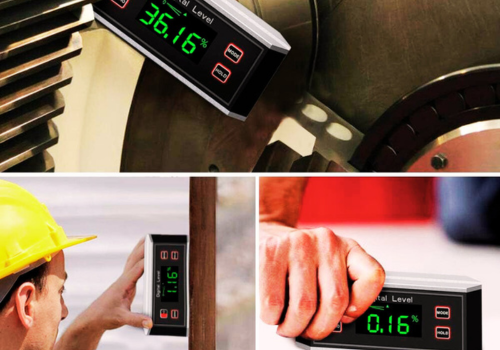
- Clear Digital Display – The LCD or LED screen clearly displays the angle of tilt, taking the ambiguity out of reading the bubble level. Some even have colour indicators to make it obvious if you’re level (green) or not (red).
- Improved Visibility – The backlit display makes it easy to read your measurements, even in dim lighting conditions where traditional levels struggle. No more squinting and crouching to get the right angle.
- Added Features – Many digital levels have great extras like a hold mode to freeze the reading, automatic shutoff to save battery life, and the ability to switch measurement types (degrees, percent slope, mm/m).
So if you do any kind of precision work, whether it’s installing cabinets, tiling floors, or building a deck, a digital level will make your job much easier!
Choosing the Right Digital Level for You
Once you decide to go digital, how do you pick the right level for your needs? Here are the key factors to consider:
Accuracy
The main specification to pay attention to is the accuracy, measured in degrees or percent slope. The more sensitive the internal sensor, the more precise the readings will be. Look for at least 0.1 degree (or 0.2% slope) accuracy for finish work. If you just need basic measurements, 0.5 degrees (or 1% slope) is adequate.
Size/Portability
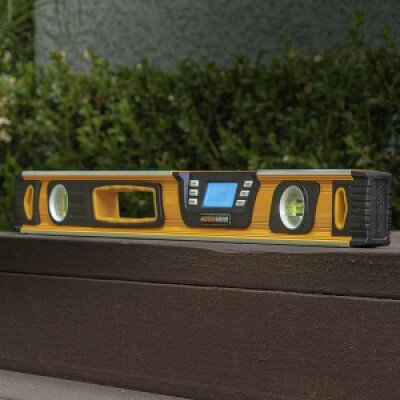
Consider the size and weight of the level, especially if you’ll be carrying it around job sites. Smaller pocket models are extremely portable but usually not as accurate. Larger levels (2ft and up) are heavy but provide great stability across wider surfaces. Pick based on your usage – in your toolbelt vs leveling countertops.
Battery Life
Most digital levels run off standard lithium or alkaline batteries. Just make sure to note the expected battery life and factor in replacement costs. Auto-off features help preserve battery life. I also recommend carrying spare batteries just in case they die mid-project.
Durability
These tools can take some knocks at a chaotic job site. Look for rugged designs with strong protective housing that can withstand some abuse. Water resistance is also nice to have in case it gets splashed or dropped in a puddle.
Warranty
It’s worth paying a bit more for levels with at least a 1-2 year manufacturer’s warranty. That protects your investment if anything goes haywire. My Stabila has a 3 year warranty and they really stand behind their products.
Some quality brands I recommend are Stabila, Kapro, Bosch, and Johnson. I personally use Bosch For General work and the Stabila Magnetic for steel projects – a bit pricey but worth it for the superb German engineering. It has never let me down through years of heavy usage.
Setting Up Your Digital Level
Okay, you’ve selected the perfect digital level. Before you start using it on the job, take a minute to properly set it up. Following these steps will ensure you get accurate readings every time:
Securely Mount the Base
Digital levels have a smooth flat base that needs full, even contact with the surface you’re measuring. On smooth surfaces, simply place the level down gently. If the surface is slightly uneven, you may need to add a bit of painters tape under the base. For very uneven surfaces, attach the level to a sturdy board that can sit evenly across multiple high/low points.
Calibrate Before First Use
Brand new out of the box, you’ll need to calibrate the level to your local gravity before relying on the measurements. Simply turn on the level and leave it on a flat, level surface. Adjust the calibration according to the instructions until the display reads 0.0 degrees. Takes about 30 seconds, and you’re good to go.
Re-Calibrate Periodically
Like any precision instrument, digital levels can get knocked out of calibration over time. I recommend double checking the calibration monthly or if you experience any weird measurements. Simply repeat the calibration procedure. If it gets way out of whack, contact the manufacturer about possible sensor issues.
Putting Your Digital Level to Work
You’re all set up and calibrated. Time to start reaping the benefits of your digital level on the job site! Here are some tips for reliable, accurate measurements:
Turn It On and Note the Readout
Power up the level, noting whether the display reads degrees, percent slope, or mm/m depending on your preference. The readout should flash or blink if it’s not level. Pay attention to whether it displays one axis (standard) or two (X and Y).
Place on the Surface and Wait
Gently place the level on the surface to be measured. It’s important to hold it still and upright. Give it 5-10 seconds for the sensor to stabilize before trusting the reading. The display will stop blinking when it’s ready.
Note the Reading and Adjust Accordingly
If the surface is level, the display will show 0.0 degrees (or 0% slope). If not, note whether the surface needs to come up or down on one side to get to 0. Make the necessary adjustments, recheck, and repeat until level.
Check All Directions
Just because a surface is level side to side doesn’t mean it’s also level front to back. Take readings in both directions (multiple if your level shows X and Y) to get the full picture. Digital levels have helped me catch discrepancies traditional levels would miss.
Use Special Features
Take advantage of conveniences like hold mode to freeze the reading for recording, flip mode to reverse the display orientation, or backlight mode for dim areas. Just don’t rely on the beeps alone – always verify the visual display.
Handle With Care
These are sensitive instruments, so handle gently and avoid big vibrations. Store in the protective case when not in use. Also avoid leaving them out in extreme cold or heat to maintain sensor accuracy. A little TLC goes a long way.
Ensuring Accuracy and Troubleshooting Issues
To keep your readings precise over time, make accuracy checks and troubleshooting part of your regular digital level maintenance:
Double Check Accuracy
Every so often, check the level’s accuracy against a known level surface like a granite slab or machined bar stock. If it’s reading more than 0.1 degrees off consistently, recalibrate or inspect for damage.
Replace Batteries Promptly
Letting the batteries completely die can cause calibration issues. I replace the batteries at the first low power indicator to avoid any accuracy-altering voltage drops. Lithium batteries last the longest.
Pay Attention to Physical Damage
If your level gets dropped or banged around, double check the housing and sensors for physical damage. Even if the readings seem fine, it’s possible over time that shock altered the calibration. Get it inspected by the manufacturer.
Contact the Manufacturer
If you’re troubleshooting and still getting wacky, inconsistent readings, reach out to the company for next steps. For expensive professional levels like Stabila, they may have you send it in for repair or sensor replacement to get it back to optimal accuracy.
Entering the Wide World of Digital Levels
I’ll admit, after using trusted bubble levels for so many years, it took me a while to trust the new-fangled digital readouts. But the precision of digital levels has proven invaluable, especially when doing finish work that needs to be perfectly plumb and flawless. I can’t recall the last time I reached for my old bubble levels.
Hopefully this guide has helped demystify digital levels for you as well. While it takes some practice to master a new tool, I have no doubt that digital can take your projects and craftsmanship to the next level. Just follow the setup, usage, and care tips covered here and your trusty new level will be your go-to for accuracy.
The versatility of being able to take quick, precise measurements in multiple directions makes these digital tools well worth the investment. Your finishes will look more professional, your structures will be sturdier, and you’ll sleep better at night knowing everything is perfectly level. Welcome to the wide, wonderful world of digital levels! Let me know once you get the hang of it – I’m always happy to chat tools and trade secrets.
Frequently Asked Questions About Digital Levels
Digital levels work on most common construction and home improvement materials – wood, concrete, tile, drywall, etc. Very uneven or porous surfaces may need to be smoothed first to ensure the base is flush. Avoid liquids and grease that could interfere with the sensor.
Quality digital levels are extremely precise, down to 0.1 degree or 0.2% slope. This allows for finer measurements than traditional bubble vials, which are closer to 1 degree. Digital also removes reading errors caused by parallax.
Overall they are durable tools but should still be handled with care to protect the sensitive internal sensor. Keep them calibrated, store in the protective case, and avoid temperature extremes or shocks. Change batteries promptly when low.
Yes, significant drops or damage can throw off the accuracy which is why it’s important to periodically double check the readings against a known level surface. Recalibrate if needed or contact the manufacturer for sensor replacement if damaged.
With proper care and maintenance, a quality digital level should provide consistent accuracy for many years. Consumer-grade models have a shorter lifespan around 2-5 years. Professional models from trusted brands can last 10+ years if well maintained.
For professional builders, remodelers, or anyone doing precision finish work, the added speed, accuracy and versatility of digital levels easily justifies the higher cost. Homeowners doing more casual projects may not see as much benefit.
Yes, many models have backlit displays that make the readout visible even in full sunlight. Look for levels with auto-brightness adjustment to optimize based on lighting conditions. Or use your hand to shade the display.
Quality digital levels indicate which direction (up/down and left/right) you need to adjust. Basic models just indicate un-level, so you’ll have to experiment. Having X and Y axis readings makes adjustment much easier.