
The sound of a toilet that won’t stop running can be an annoying and constant headache in your home. Whether it’s the steady trickle of the fill valve failing to shut off or the periodic flushing of a leaky flapper, a running toilet can also lead to higher than normal water bills and potential leaks or flooding. In this article we look at how to fix a running toilet with a button flush.
While calling a plumber is one solution, repairing a continuously running toilet is a common DIY project that homeowners can tackle themselves with a few tools and replacement parts.
This comprehensive guide will walk you step-by-step through the anatomy of a toilet, diagnosing common issues, and replacing parts like the flush valve, flapper, and tank bolts.
With the right information and a methodical approach, you can stop that dreadful running toilet sound and get your bathroom back to working order. We’ll also cover when it’s advisable to call in a professional plumber versus attempting the repair yourself.
Here’s a quick overview of what we’ll cover:
- Toilet anatomy – Key parts and how they work
- Diagnosing the issue – Process of elimination
- Step-by-step repairs – Fixing flappers, fill valves, and bolts
- Preventing problems – Maintenance tips
- When to call a pro – Certain repairs best left to experts
So grab your wrench and get ready to tame that troublesome toilet!
Contents
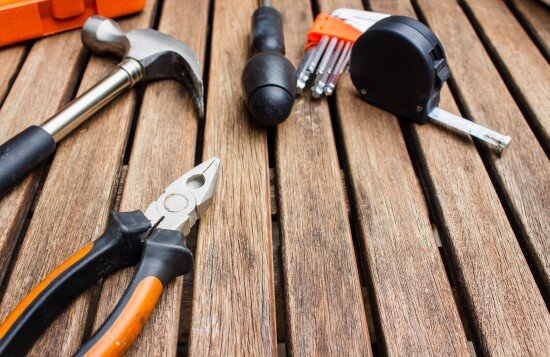
Gather Your Toilet Troubleshooting Toolkit
Before we dive into toilet anatomy and diagnosing problems, let’s gather the tools and materials we’ll need to take on these repairs ourselves. Having these supplies handy will make the process smoother when we’re knee-deep in toilet parts.
You’ll want to have:
- Adjustable wrench – For loosening nuts and bolts
- Screwdriver – Both flathead and Phillips head
- Tweezers or tongs – Helpful for removing small parts
- Replacement flapper – Match your existing one
- Fluidmaster 400A – Universal fill valve kit
- Tank bolts – Match length and style
- Gaskets – For watertight seals
- Rags or towels – To soak up any water
Don’t worry about running to the hardware store mid-repair! Gather these essentials ahead of time so you have everything on hand.
Get To Know Your Toilet Parts
Alright, class is in session! Let’s identify the key parts of a toilet so you know what’s what when troubleshooting that problematic running and leaking. Grab a pencil and paper, or just reference this article later.
A toilet has two main components – the toilet tank up top and the toilet bowl down below.
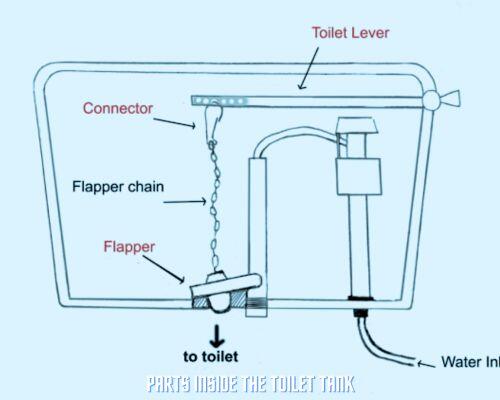
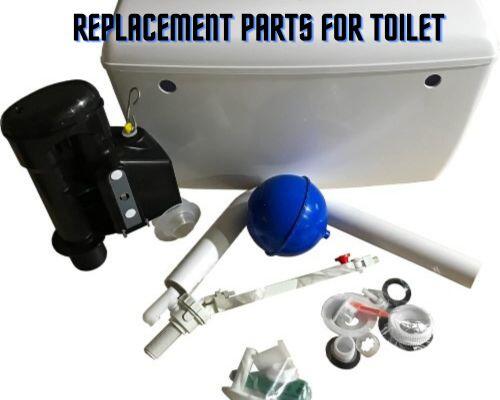
Inside the tank are a few key mechanisms:
- Fill valve – Lets water in from supply line
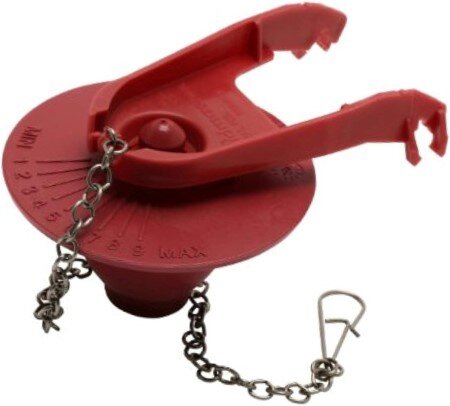
- Flapper – Seal that lifts up when flushing
- Float – Controls water level
- Handle/button – Triggers the flush
- Overflow tube – Exits excess water
When you press the flush handle or button, the flapper lifts and allows the water in the tank to empty into the bowl via the flush valve. Once empty, the fill valve opens to refill the tank until the float causes it to close. Rinse and repeat!
Understanding how each piece interacts will help immensely when we’re troubleshooting and replacing parts. Now that we’re fluent in toilet-ese, let’s move on to diagnose why yours keeps running!
Now Let’s Fix That Running Toilet
Alright, time to play toilet detective! When you hear that constant trickling or wooshing sound of water running in the bowl, the first step is confirming it’s actually a leak and not just your imagination.
Here are some clues to know if your toilet is wasting water:
- Constant low sound of flowing water
- Water level drops in tank without flushing
- Higher than normal water bill
- Water overflowing into tube
If you notice one or more of these, there’s definitely an issue. Now we need to diagnose where the leak is coming from.
Systematically testing different components is key here rather than jumping straight into loosening every bolt. Methodical troubleshooting will save you time and headaches.
Inspect the Flapper
The most common culprit is a leaky flapper. This little seal lifted up by the flush handle allows the water in the tank to empty into the bowl.
To test the flapper:
- Remove tank lid and set aside
- Flush to empty tank and wait for it to refill
- Mark water level with tape or marker
- Wait 10 minutes without flushing
- Check if water lowered below mark
If so, you likely have a flapper leak! Time to replace that worn out seal.
Assess the Fill Valve
If the flapper checks out, next investigate the fill valve. This piece refills the tank after a flush by opening when water is needed. Issues arise if it fails to fully close.
To test the fill valve:
- Remove the tank lid
- Locate fill valve (right side)
- Place finger on valve top when tank full
- Can you feel water pressure?
- Does level drop without flushing?
A stuck open fill valve will make both those things happen. Try cleaning debris first, or replace the fill valve altogether.
Don’t Forget the Tank Bolts
Finally, don’t rule out loose, broken, or missing tank bolts on the underside. The tank rests on these bolts, which attach to the bowl. If compromised, water can leak through these openings.
Give the bolts a shake to check for looseness. Rust and corrosion also means they should be replaced with shiny new ones.
Now that we’ve pinpointed the problematic part, let’s fix it!
DIY Toilet Repair Instructions
Alright, we found the culprit through our detective work. Time to dive into the repair process! I’ll provide step-by-step instructions for fixing each common running toilet issue.
Replacing the Flapper
A faulty flapper seal is often the reason for a running toilet. Replacing this part is straightforward:
- Turn off water supply valve and flush out water
- Disconnect flapper chain from handle/button
- Remove old flapper seal and clean mating surfaces
- Install new flapper seal by firmly pushing into place
- Reconnect flapper chain with proper slack
- Turn water back on and test flush
Make sure you purchase the correct replacement flapper for your toilet model. Watch for chain length and orientation too when reconnecting.
Cleaning or Replacing Fill Valve
If you diagnosed the fill valve as the problem, here’s how to address that:
- Turn off water supply and flush out tank
- Remove fill valve nut and lift out old valve
- Scrub valve ports with brush to remove gunk and debris
- For replacement, install new fill valve gasket and shank washer
- Securely tighten new valve nut and adjust float cup height
- Turn on water and check for leaks and proper shutoff
Sometimes a good scrubbing fixes the issue, other times replacing the fill valve is needed. New ones are inexpensive and screw in easily.
Securing Loose Tank Bolts
Finally, to address problematic tank bolts here are the steps:
- Turn off water supply and empty tank
- Remove old tank bolts and discard along with gasket
- Clean bolt holes to remove contaminants
- Install new bolts and gasket in clockwise pattern
- Tighten bolts evenly with wrench
- Refill tank and verify no leakage
Don’t overtighten when securing the bolts! Snug is sufficient to create a seal and hold the tank.
Whew, we covered a lot of ground in diagnosing and fixing your toilet troubles! Let those repair instructions soak in, then revisit to walk through the process on your own running toilet.
Here is a video by Plumberparts on How To Fix A running Toilet with a push buttonKeep That Toilet Trouble-Free
Our toilet is fixed and back in working order! But let’s look at some maintenance tips to prevent future problems and enjoy a continuously functioning throne:
- Check for leaks – Periodically inspect for signs of leaks
- Replace parts proactively – Flappers and fill valves wear out over time
- Clean mineral deposits – Prevent clogged ports and sticking parts
- Ensure proper water level – Adjust fill valve to manufacturer recommendation
- Update components if needed – New efficient models can save water
A few minutes of prevention can avoid major issues down the road!
Knowing When to Call in a Pro
While common toilet repairs are doable yourself, certain situations do warrant calling a professional plumber:
- Leak origin is unclear after troubleshooting
- Multiple issues arise like flapper and fill valve simultaneously
- Shutoff valve replacement is needed
- Wax ring seal is compromised
- Severe corrosion and mineral buildup exists
- Main sewer clog affecting toilet
Don’t be afraid to phone a friend if things get too complex! Plumbers have years of experience and proper equipment.
Explore Solutions Beyond DIY
If you’ve replaced parts and are still having issues, it may be time to consider upgrades:
- Dual flush eco-toilets – Significantly reduce water usage
- Smart home monitoring – Get alerts for leaks/high water usage
- Rebate programs – Some utilities offer incentives to upgrade
- Whole home inspections – Check water pressure and pipes
Running toilets don’t have to be a fact of life! With some diligence and willingness to adopt new technology, you can maintain a water-efficient household.
FAQs About Running Toilet Repairs
Let’s round up our toilet education with answers to common questions:
Why does my toilet intermittently run?
This is likely a flapper or fill valve issue that hasn’t fully failed yet. Replace parts before it worsens.
What color should my tank water be?
Clean, clear water is ideal. Discoloration like yellow or brown indicates rusty pipes or bacteria.
Why does my toilet make noise but not run?
Noises during the refill cycle may indicate issues with the fill valve or fluid dynamics. Adjust water pressure or replace the valve.
My toilet won’t stop running after replacing parts. Now what?
The shutoff valve or fluid dynamics may be faulty. A full valve replacement kit or professional help may be needed.
Can a constantly running toilet be dangerous?
Yes, it can lead to leaks, flooding, slippery wet floors, mold growth, and higher utility bills over time if unaddressed.
Keep That Toilet Tuned Up!
Whew, we covered everything from toilet anatomy and troubleshooting to repairs, maintenance, and upgrades. Hopefully now you feel empowered to put on your plumber’s cap and fix that troublesome running toilet yourself.
With the right tools and replacement parts, the ability to stop a running toilet is in your hands!
Remember to work methodically, exercise patience, and don’t hesitate to call a professional plumber for assistance on complex issues.
The goal is restoring a fully functioning, water efficient toilet while avoiding leaks and accidents.
Now get out there, grab a wrench, and stop that infernal running sound once and for all! Your water bill and home will thank you.