You’ve probably landed on this page because you just bought an air compressor and you want to know exactly how to use it. I am going to take you through all the steps you need to take to get you operational in no time.
I’m sure that by this time you know what an air compressor is used for, so I won’t go in to detail about what it is and how it works. The aim of this article is to give you a quick guide on how to get started with your new air compressor.
In this article I will mainly focus on electric air compressors that can be used in the home garage or workshop. I would never advise anyone to use a gas air compressor indoors, so that would be a discussion for another day.
Contents
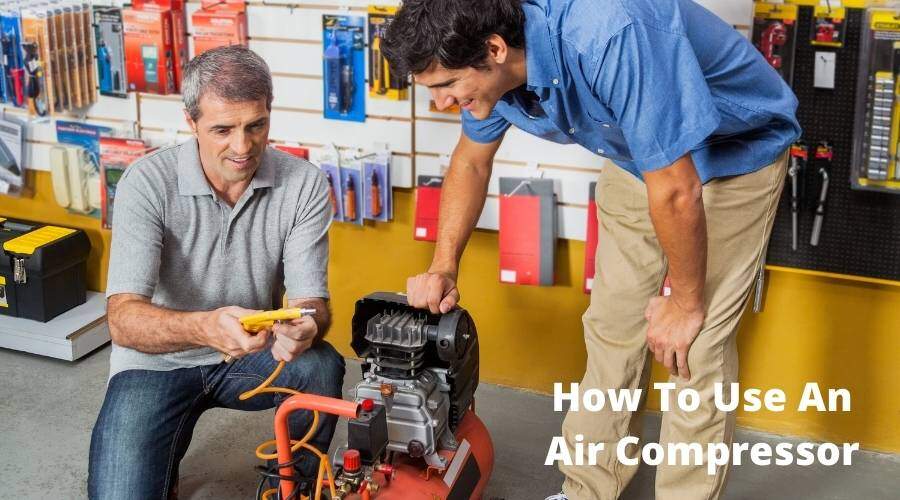
How To Use An Air Compressor – Getting Started
Read The Instructions Manual!
This goes without saying, but you would be surprised how many people go straight to Youtube to watch a general instruction video on air compressors.
Every air compressor is different and may have different setup requirements. Read through the manual and make sure that you are familiar with all the setup procedures and requirements.
Setting Up Your Air Compressor
Position
So, you’ve bought the best air compressor for your specific needs and you want to get it set up as quickly as possible. The setup procedure starts with finding the best position for your compressor. This should be near an electric outlet and on a flat, level space.
Most portable air compressors do not have to be secured to the floor, so a flat, level surface is crucial in limiting vibration and movement.
Check Oil
Most electric air compressors are oil-lubricated and need to be filled with the correct oil to ensure smooth running and durability.
Locate the dipstick and pull it out – check that the oil level reaches at least two thirds up the dipstick ( when there is no level mark on dipstick) If you need to fill the oil, refer to the instructions manual where you will find what type of oil to use.
Check The Drain
Before you start up, you should check the drain. This would be at the bottom of the air compressor tank. Open the drain to make sure no fluid is in the tank, then close the drain securely. Air will escape through the drain if not closed properly.

Operating Your Air Compressor
Switch On
Now that your air compressor is in place and you have done all the checks, it is time to switch it on and fill the air tank. First you have to plug in the electric cord ( I know this is obvious, but you never know..)
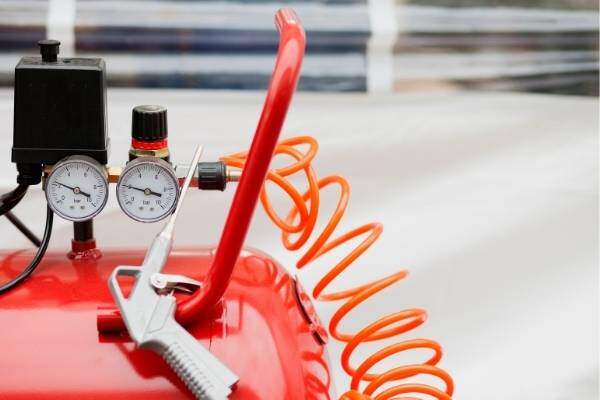
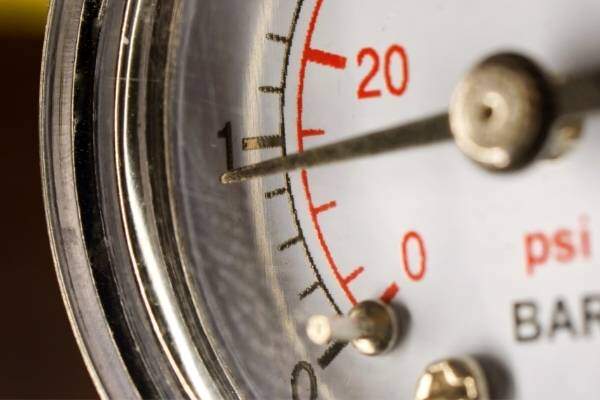
Set the PSI to 100 using the control valve and switch on your compressor. Let the air tank fill and make sure it shuts off when 100 PSI is reached. If this all happened, you are good to go and can start using your compressor to power air tools.
Another quick tip is to test the safety valve. This valve can be used when the pressure controls malfunction. It basically allows you to release air from the tank when needed.
Pull the safety valve and make sure that air is released when this valve is opened. Release the safety valve and make that air flow out the valve stops when released.
Connect Air Hose
My first tip here is to purchase an air hose that is long enough to reach most areas of your garage. It is extremely annoying to have to move the compressor when the hose doesn’t reach.
Nowadays most hoses are fitted with quick-couplers making it easy to connect and disconnect.
Connect the air hose to the air compressor by inserting the male connector of the hose into the female connector of the compressor.
Connect Your Desired Air Tool
Now that the hose is connected, you can go ahead connect your tool of choice. Insert the coupler of the desired air tool into the hose. You are now almost ready to start using your air tool, just one more step.
Select The Correct PSI
All air tools have PSI and CFM requirements. PSI is short for pressure per square inch, so this is basically how much pressure a tool needs to function properly. To operate a specific tool, you need to know what the PSI rating is. This would be printed on the tool or can be found in the instructions manual.
Once you have determined what the PSI requirement is, set the PSI (using the control valve) on the air compressor to that mark. You can also read this article on how air compressors work.
You have now completed all the necessary steps to start using your air compressor to power air tools.
Using Different Air Tools With Your Air Compressor
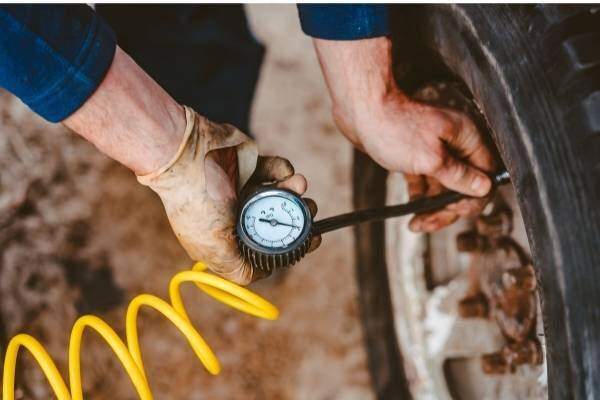
How to Use An Air Compressor to Inflate Tires
Using an air compressor to inflate tires is very easy when you have the right equipment. You will need an tire inflator gauge to get the job done.
Connect the tire inflator gauge to the air hose to get started. Remove the valve cap from the tire and connect the end of the inflator to the valve. The gauge will now register how much air is in the tire and display the reading in PSI.
Make sure you know what the recommended PSI is for that specific tire and inflate until the desired PSI is reached. Replace the valve cap and you are done. Easy as that!
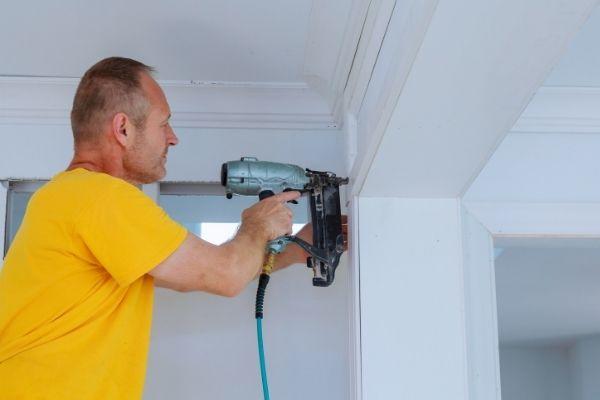
How to use An Air Compressor With A Nail Gun
A nail gun is great for speeding up any woodworking job. Before connecting a nail gun to your air compressor, make sure you set the correct outlet PSI for this tool. Allow the compressor to fill with air before using the nail gun.
Once the compressor has reached maximum pressure, double check that you have set the correct PSI as specified by the nail gun manufacturer.
Connect your nail gun to the air hose and set the nail depth to the desired setting. You are now ready to start using the nail gun. To drive a nail, push the nail gun down against the wood and pull the trigger. This will drive a nail from the cartridge into the wood at the pre-set depth.
How To Use An Air Compressor To Paint
A spray gun can be connected to an air compressor to do spray painting. This is the most effective way to paint any surface and produce the best results by far.
There are three parts to getting this job right. Firstly, the air compressor needs to be set to the correct pressure for your spray gun and the air needs to be moisture-free. Moisture will cause bubbles in the paint and ruin your spray job.
Secondly, your paint has to be mixed correctly. Follow the instructions of the manufacturer and make sure your measurements are spot on. Paint that is mixed too thin will cause runs when applied and paint mixed too thick will produce a rough surface and clog up your spray gun.

Thirdly, the spray gun needs to be set correctly. Set the spray gun to a wide spray beam and adjust the pressure until you get the desired spray. Always spray on a test surface first to check that all is well. Once you are happy with the outcome, you can go ahead and apply that beautiful coat of paint.
After Use Care
Best practise is to always drain the air tank after use. Locate the drain at the bottom of the tank and open it. Some models may require the use of a wrench, while other can be opened by hand.
Leave the drain open for a few minutes to ensure that all moisture drains from the tank. After draining, replace the drain valve (or close it) and your compressor is now ready for storage until you use it again.
To get more information, you can watch this video by the guys from Around The Home. This video takes you through all the steps on how to use an air compressor.
Conclusion
An air compressor is a very handy tool to have in the garage. You can use it to power a wide range of air tools from spray painters to tyre inflators. This article is a quick guide on how to get started, and as mentioned before – Always read the instructions manual of your specific model first!
The setup process is not difficult and once you know how to use an air compressor it will provide you with hundreds of hours of service. Please remember to always keep safety in mind when you use an air compressor.